Methodology and key principles for designing 7-a-side football drills for young players
Before placing the cones on the pitch, we need to understand the developmental stage our players are at. An 8-year-old U10 player cannot be coached in the same way as an 11-year-old U12 player. Training activities must be adapted to children’s neurocognitive and motor development.
Cognitive and motor differences between U10 and U12 players
- U10 age group (8–9 years): At this stage, motor egocentrism and tunnel vision towards the ball are common. Children naturally want to stay close to the ball. Drills should prioritise individual ball control, dribbling, awareness of the immediate surroundings and the introduction of simple supporting movements. Explanations should be short (under 90 seconds) and supported by clear visual cues.
- U12 age group (10–11 years): Players begin to develop abstract thinking and a better understanding of space and time. They can identify passive passing lanes, create third-player combinations, rotate positions and understand width and depth. At this stage, we can introduce greater tactical complexity, faster transitions and drills involving more complex numerical advantages and disadvantages.
Methodological principles of integrated training drills
For a 7-a-side football drill to be considered high quality, it should meet four fundamental criteria:
- Constant presence of opponents and teammates: Except during reactivation warm-ups or very specific technical-development phases, football is played against opponents. The decision-making and action stimulus must be present.
- Directionality: Except in possession rondos, drills should have a clear direction, with one goal to attack and another to defend.
- Transferability to real match situations: Every drill should reflect a situation the player may encounter in a 7-a-side match on Saturday.
- Managing uncertainty: Adjust the dimensions, number of touches or use of neutral players to make players continually scan their surroundings.
12 7-a-side football drills organised by tactical objective
Below is a selection of 12 drills grouped into four fundamental areas of the game. You can adapt them to your daily training plan using session-design tools such as bcoach, allowing you to digitise your drill cards and adjust the playing areas to suit the number of players available.
Block 1: Ball retention and decision-making
1. Positional 4v2 rondo with a switch of play (U12)
- Objective: Draw pressure into the centre to pin opponents and switch play towards the free space.
- Area: 18 x 12 metres, divided into two adjacent 9 x 12-metre squares.
- Equipment: Two colours of bibs, cones and footballs.
- Organisation: A 4v2 is played in the first square, with four attackers positioned around the perimeter or inside the area against two defenders. After completing at least four consecutive passes, the team in possession must find a neutral player positioned in the adjacent square. Two attackers and one defender then quickly move into the new area to restart the pattern.
- Variations / constraints: Limit attackers to a maximum of two touches. If the defenders win the ball, they can score two points by shooting into an external mini-goal.
- Coaching tip: Encourage your inside players to pin the defender before passing. If they release the ball too early without attracting the opponent, switching play will not create usable space.
2. 3v3 diamond possession with two outside neutral players (U10)
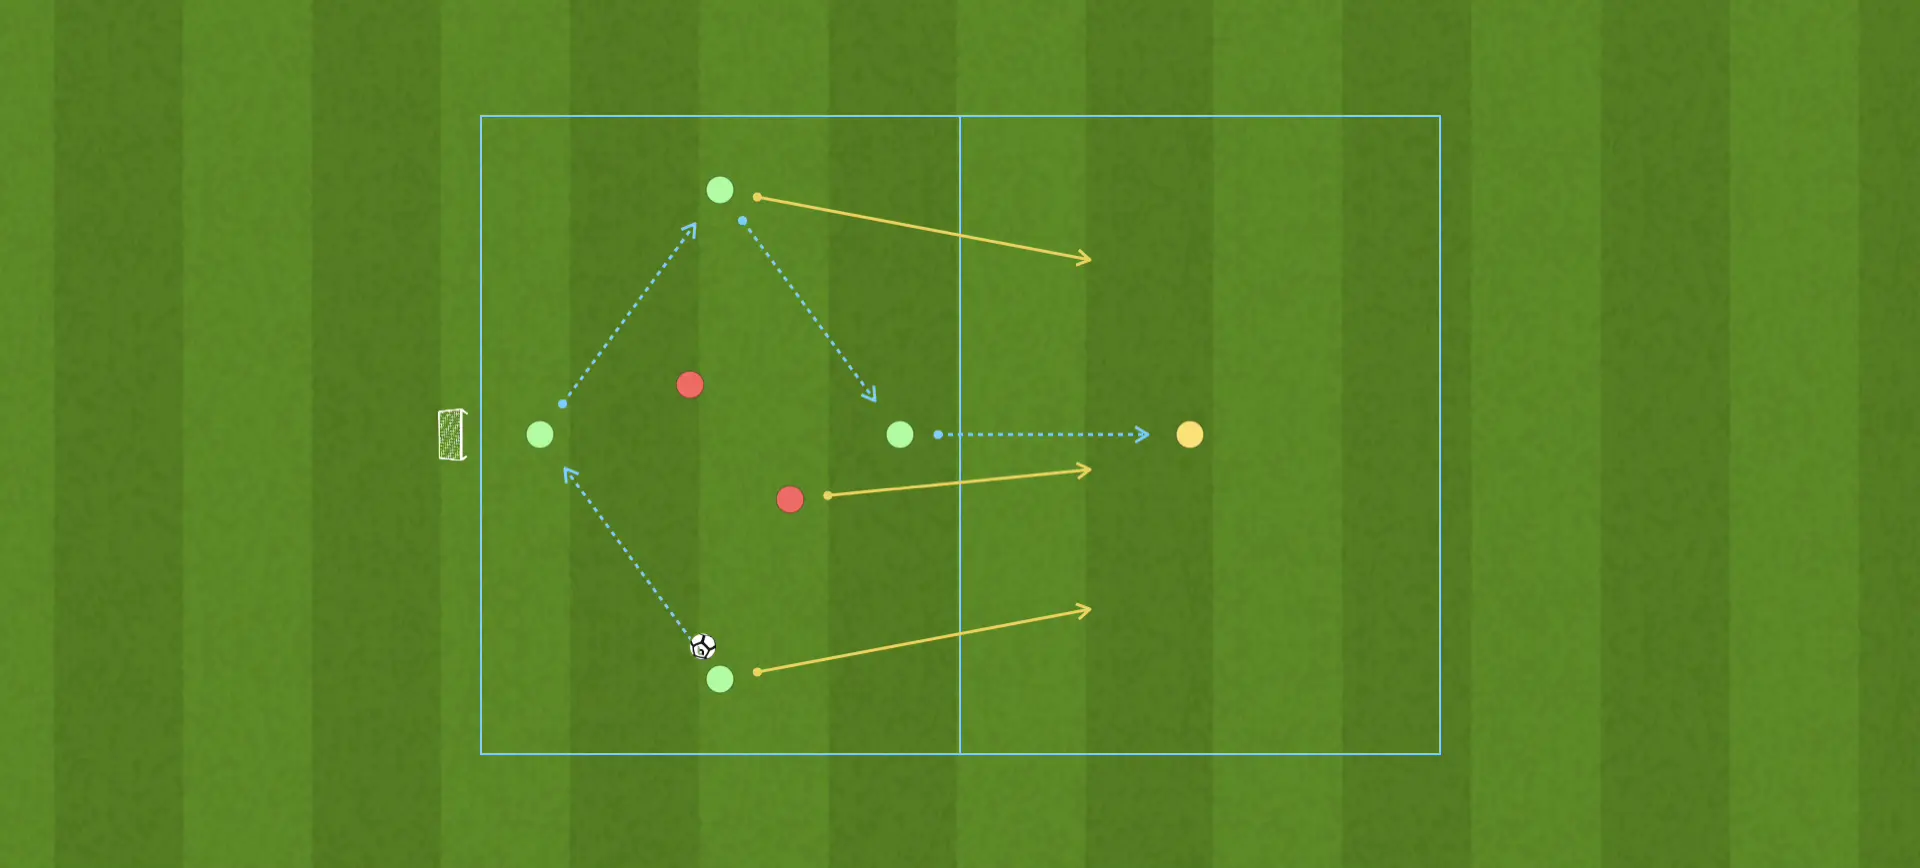
- Objective: Encourage support in wide areas and good body orientation when receiving the ball.
- Area: 15 x 15-metre square.
- Equipment: Cones and three colours of bibs.
- Organisation: A 3v3 takes place inside the area, with two neutral players positioned outside on opposite touchlines. The team in possession aims to keep the ball by making continuous use of the outside support players. If the defenders win possession, they swap roles with the team that lost the ball.
- Variations: The neutral player receiving the ball must play it back first time. Introduce a rule requiring the ball to go through both neutral players before a target score is awarded (10 passes = 1 goal).
- Coaching tip: With U10 players, emphasise body shape. Encourage them to receive with their far foot so they can see as much of the pitch as possible, ideally through a 180-degree field of vision.
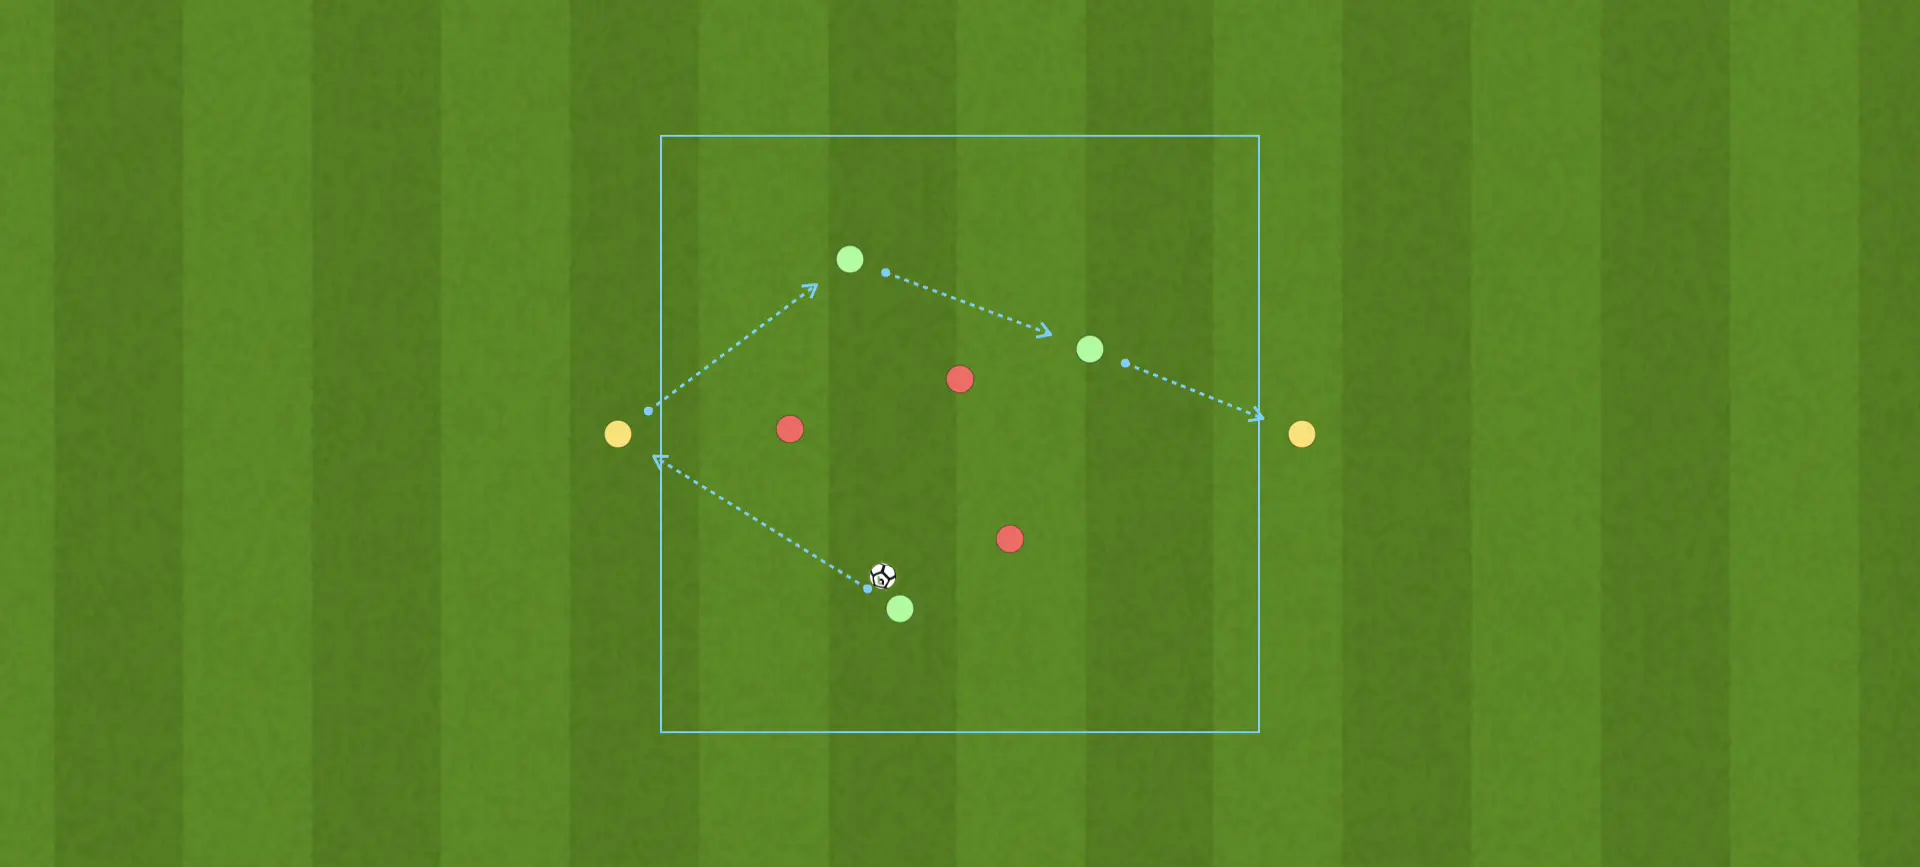
3. Vertical progression zones: 3v3+1 (U10 and U12)
- Objective: Break through pressing lines with incisive passes.
- Area: Three connected rectangular zones (Zone A: 10 x 15 m, Zone B: 5 x 15 m, Zone C: 10 x 15 m).
- Equipment: Cones and footballs.
- Organisation: Play begins in Zone A with a 3v1, including a neutral player. After three passes, the team must play a low, incisive pass into Zone C through Zone B, where two intermediate defenders attempt to block the passing lanes. If the ball reaches Zone C, two attackers from Zone A move forward to create another numerical advantage in the final zone.
- Variations: Allow one of the defenders in Zone B to press into Zone A after three seconds.
- Coaching tip: Teach the concept of ‘driving to commit’. If the player in possession does not threaten to advance, the intermediate defensive line in Zone B will never open up the inside passing lane.
Block 2: Quick transitions and counter-pressing
4. Continuous 2v1 to 3v2 transition with two goals (U10)
- Objective: Develop speed in counter-attacks and an immediate, intensive defensive recovery.
- Area: Reduced 7-a-side pitch (30 x 20 metres), with two regulation goals and goalkeepers.
- Equipment: Bibs and footballs placed in the goals.
- Organisation: Start with a 2v1 in favour of the red team against one blue defender. As soon as the move ends (goal, save or ball out of play), the blue defender joins the attack along with two teammates entering from the end line, creating an immediate 3v2 towards the opposite goal. The two red attackers who have just finished their move must immediately recover into defensive positions.
- Variations: Set a maximum of eight seconds to finish the counter-attack.
- Coaching tip: The key to this drill is mental reaction speed. The switch from ‘attack mode’ to ‘defence mode’ must be immediate.
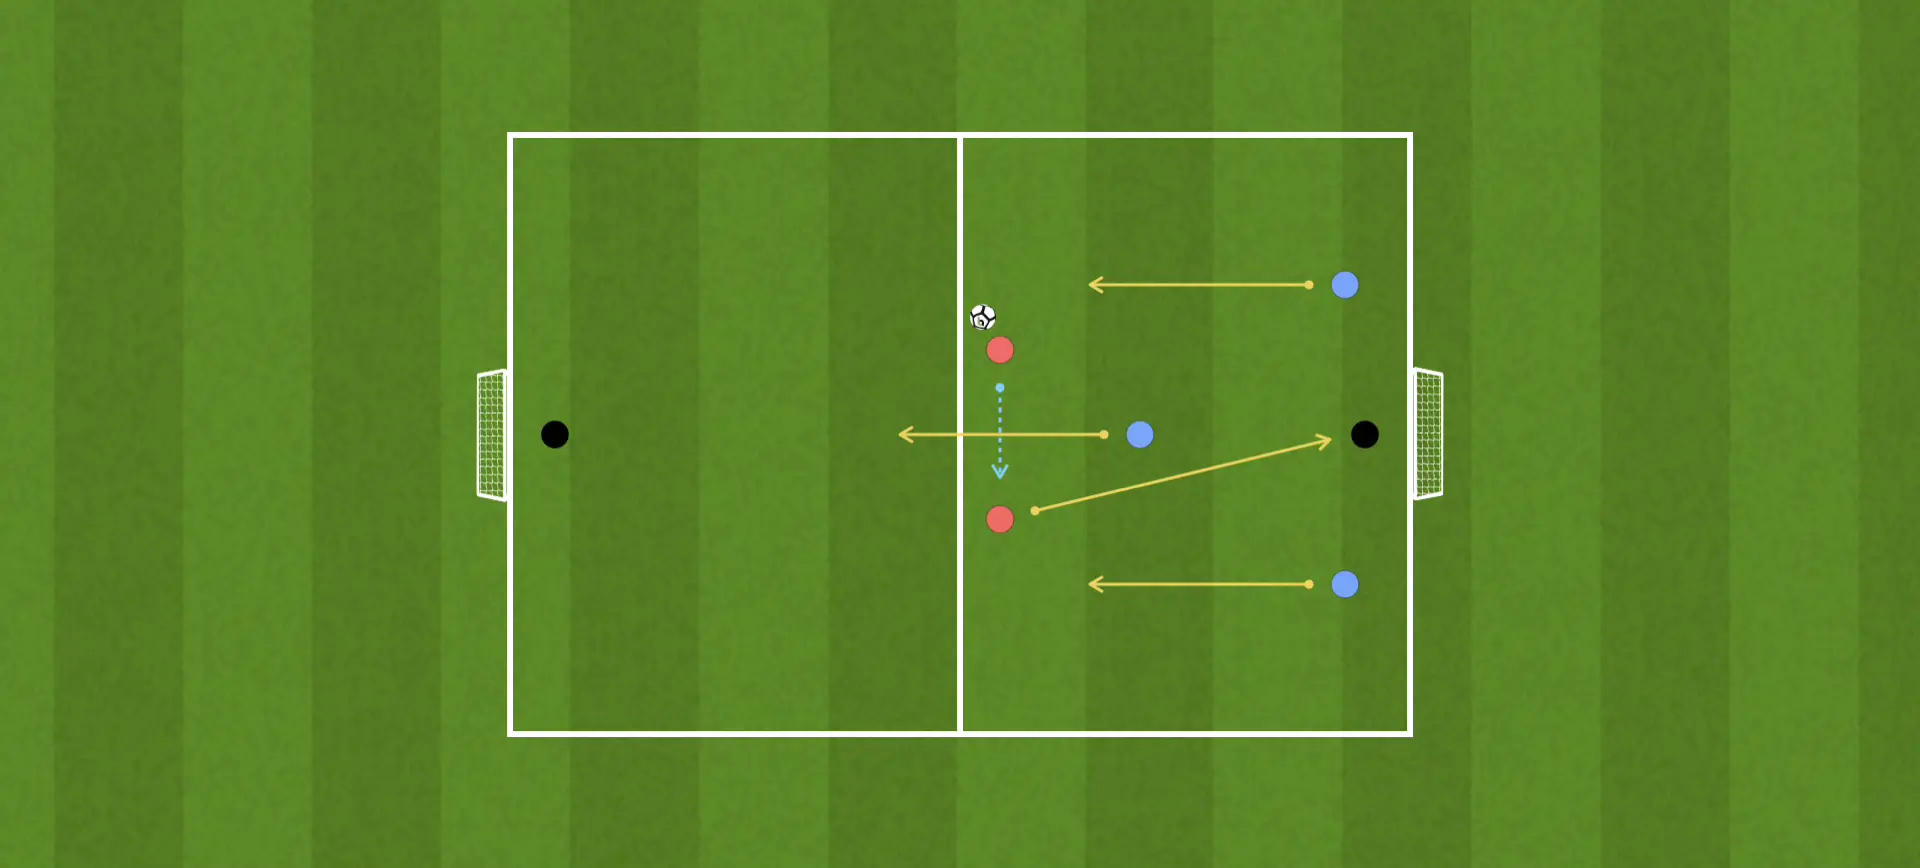
5. Quick counter-pressing wave: 4v4 + 2 goalkeepers (U12)
- Objective: Develop immediate defensive pressure after losing possession to prevent the opposition from launching an attack.
- Area: 35 x 25 metres, divided by a halfway line.
- Equipment: Footballs in the centre of the pitch and bibs.
- Organisation: Play a 4v4 with goalkeepers. If Team A loses possession in the opposition’s half, the entire team has five seconds to apply intense pressure to the player on the ball. If they regain possession within those five seconds, the goal they subsequently score counts triple. If Team B beats the press and crosses the halfway line, play continues normally.
- Variations: If Team B completes three passes after regaining possession, Team A must perform five press-ups or retreat to its own penalty area before pressing again.
- Coaching tip: Reward the attitude of the first presser. The nearest player must press aggressively without diving in, buying time for teammates to provide cover.
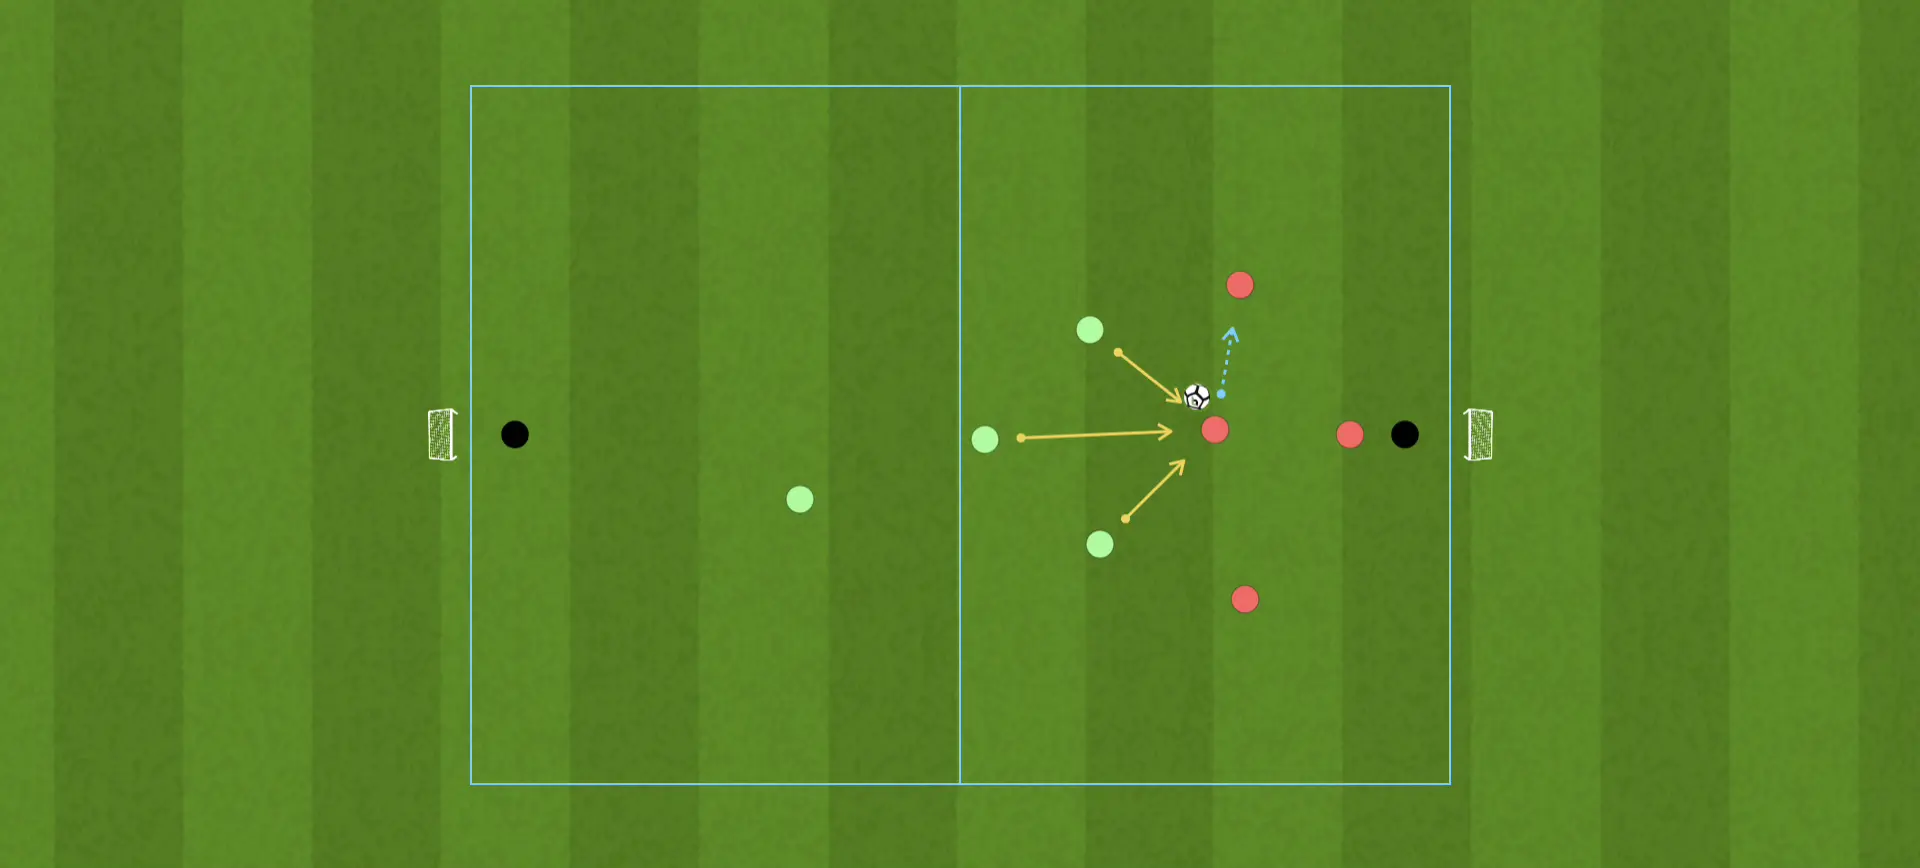
6. 1v1 duel with supporting players joining during the transition (U10 and U12)
- Objective: Develop dribbling skills and mutual support after beating an opponent.
- Area: 20 x 15 metres with two mini-goals.
- Equipment: Cones and footballs.
- Organisation: One attacker takes on one defender in a straight 1v1. If the attacker beats the defender and crosses the 10-metre dashed line, a second attacker and a second defender enter from the touchlines, turning the move into a fast-paced 2v2.
- Variations: If the defender wins the ball during the 1v1, the roles switch immediately and the new attacker heads towards the opposite mini-goal.
- Coaching tip: Ideal for U10 players. Overcoming the fear of taking on an opponent is vital at this age. This drill builds confidence to attempt a dribble by rewarding players with an advantage in space and time.
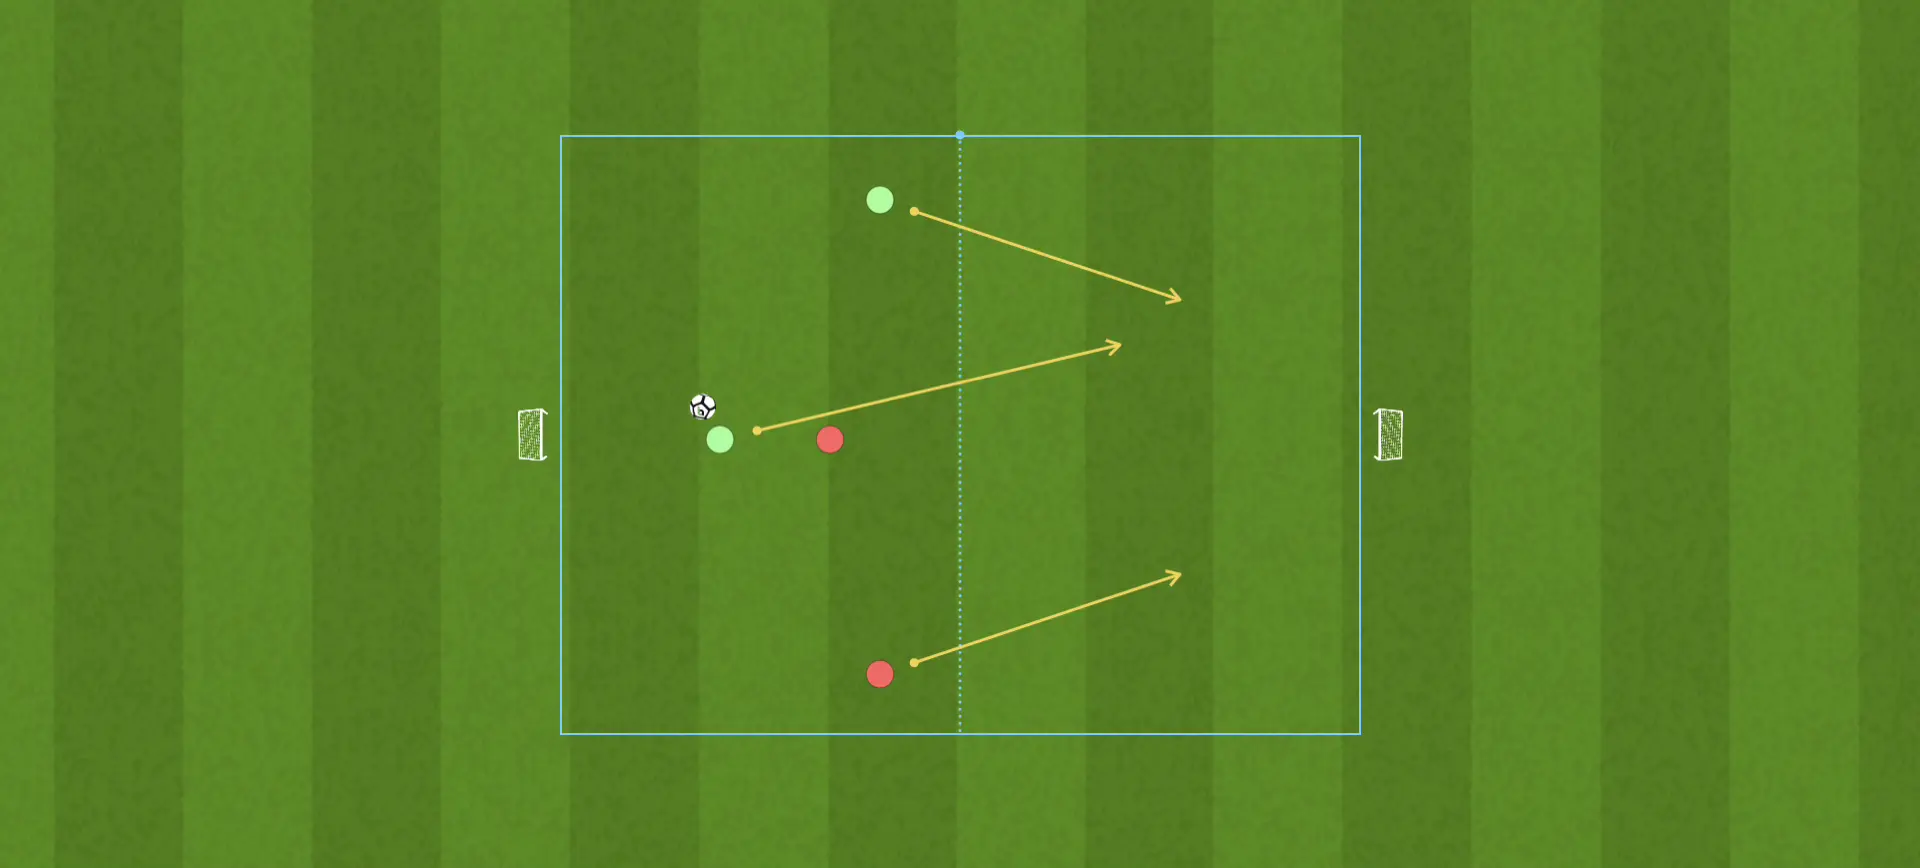
Block 3: Finishing and organised attacking
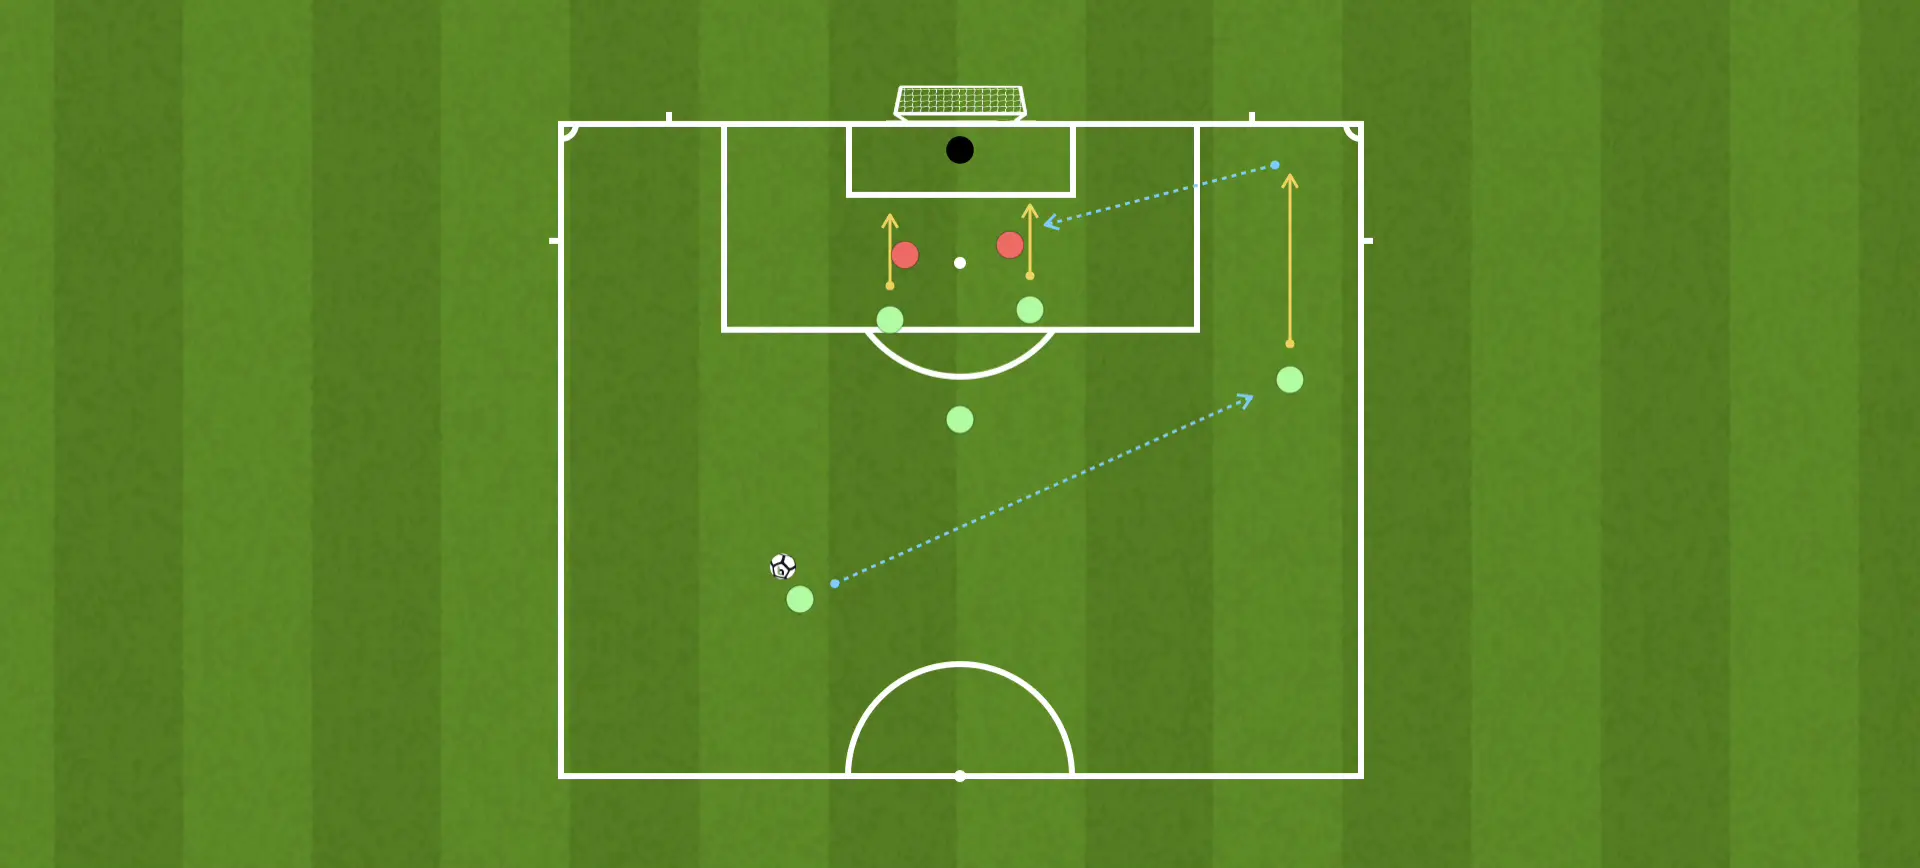
7. Crossing and finishing with progressive opposition: 3v2 + goalkeeper (U12)
- Objective: Practise finishing in the penalty area and making runs towards the near and far posts.
- Area: Enlarged 7-a-side penalty area (25 x 25 metres).
- Equipment: Footballs positioned near the corners and touchlines.
- Organisation: A midfielder switches play to an unmarked winger. The winger drives towards the byline and delivers a cross. Inside the penalty area, two forwards attack against two centre-backs and a goalkeeper. A third attacker arrives from the second line at the edge of the area to follow up any rebounds.
- Variations: Require the cross to be either an aerial delivery or a driven, low cross, depending on the coaching staff’s instructions.
- Coaching tip: With U12 players, teach the striker not to make the run too early. The run into space should begin when the crosser looks up before striking the ball.
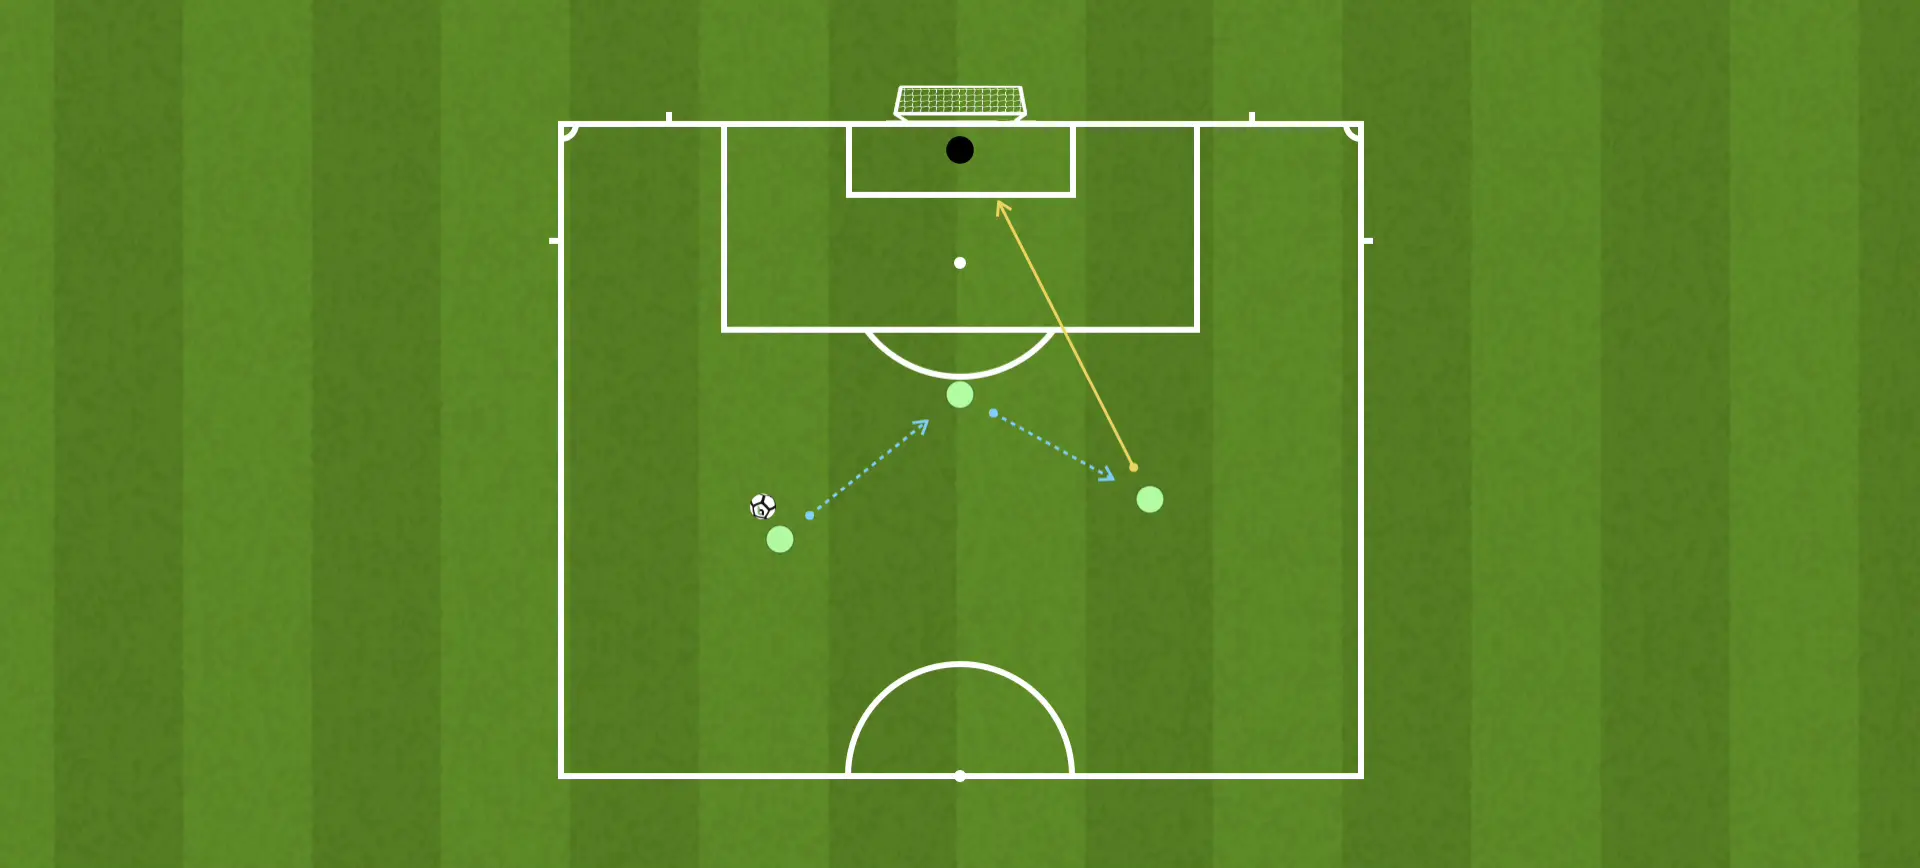
8. Quick combination and shooting drill with a lay-off (U10)
- Objective: Improve shooting from distance and one-two combinations.
- Area: In front of the 7-a-side penalty area, 12–15 metres from goal.
- Equipment: Cones, poles and footballs.
- Organisation: Player A plays a through ball to striker B, who lays the ball off first time to A or to C, who is arriving facing forward. The receiving player takes a positive first touch to move around a pole representing a defender, then strikes a powerful shot at goal before entering the penalty area.
- Variations: Add a passive defender who moves out to put pressure on the player receiving the lay-off.
- Coaching tip: Make sure the lay-off is not a ‘rigid wall pass’. It should be cushioned, leaving the ball settled and rolling gently into the path of the player taking the shot.
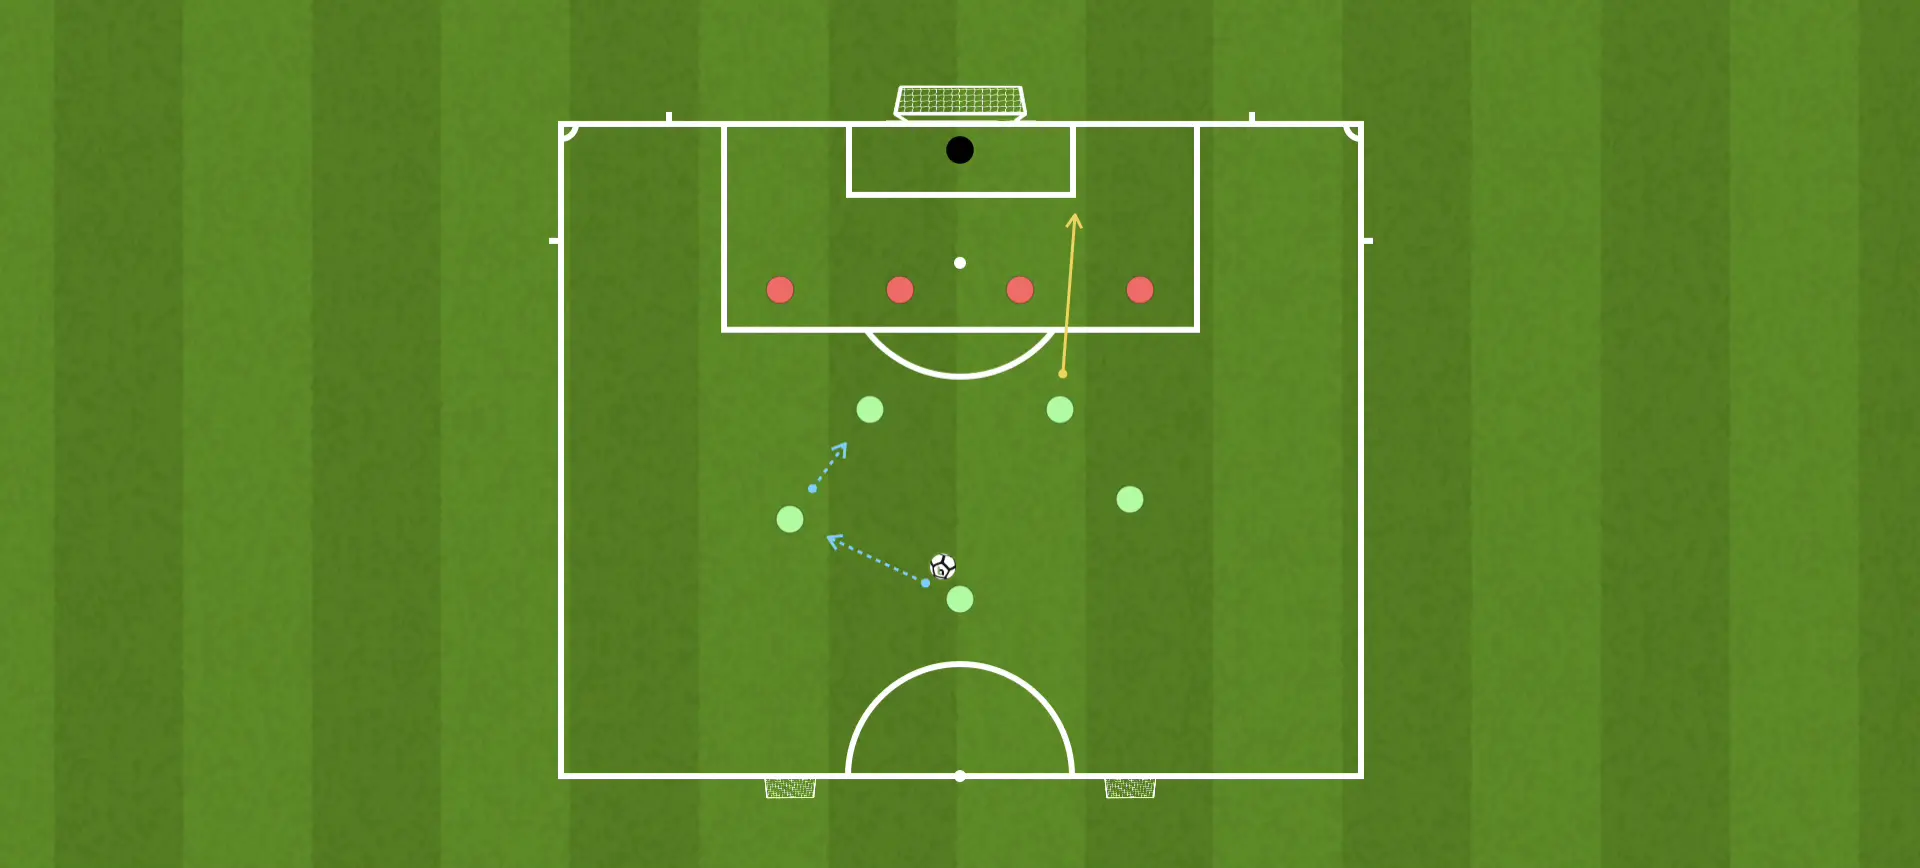
9. Attack vs defence in half a pitch: 5v4 with a touch restriction (U12)
- Objective: Create numerical advantages in central areas and exploit width on the flanks.
- Area: One regulation half of a 7-a-side pitch.
- Equipment: Two colours of bibs, the main goal and two mini-goals on the halfway line.
- Organisation: The attacking team of five attempts to beat the opposition goalkeeper against a defensive line of four. If the defenders win possession, they must score in either of the two mini-goals on the halfway line within ten seconds.
- Variations: Attacking players are limited to three touches each in the build-up area, but can use unlimited touches inside the opposition penalty area.
- Coaching tip: Use this drill to reinforce the automatisms of your team’s formation, such as a 1-3-2-1 or 1-2-3-1 system.
Block 4: Tactical foundations and positional play
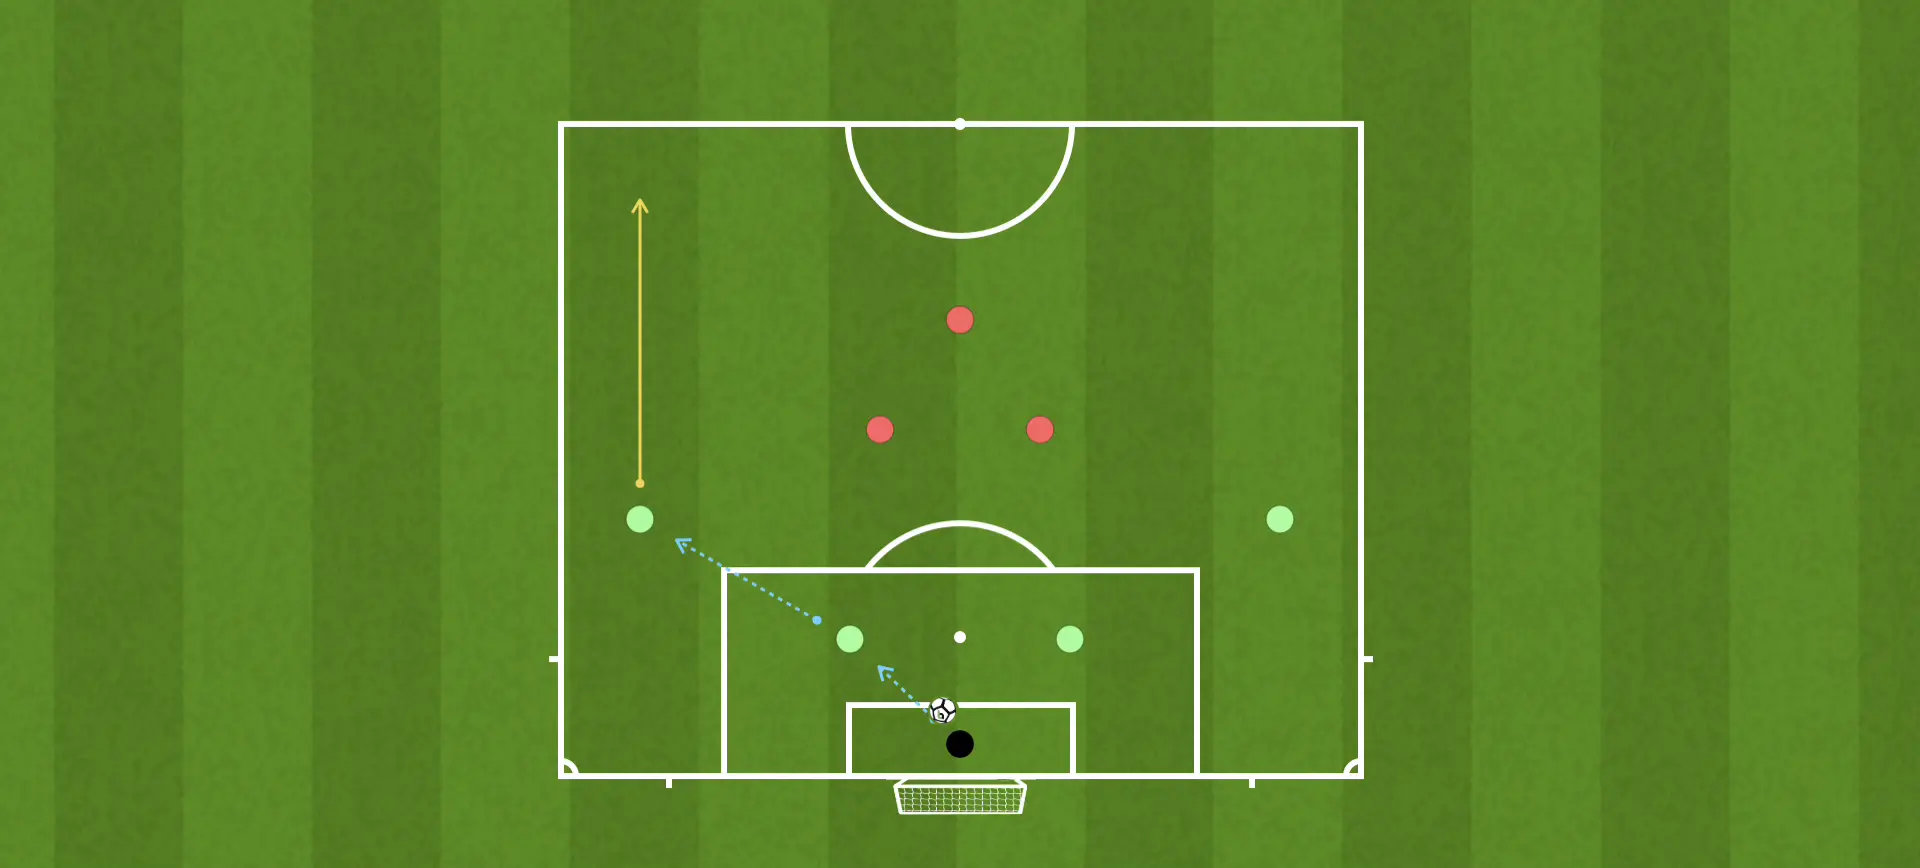
10. Playing out from the back and breaking lines: 4v3 (U12)
- Objective: Develop a structured build-up from the goalkeeper and learn how to beat the opposition’s first pressing line.
- Area: Own half of a 7-a-side pitch, from the goal line to halfway.
- Equipment: Cones to mark out zones and footballs.
- Organisation: The goalkeeper starts play with a short pass to one of the two deep defenders. The team building from the back consists of the goalkeeper, two deep defenders and two wide players (five players involved in the build-up phase), facing three opposition forwards or midfielders applying pressure. The objective is to carry the ball or complete a controlled pass beyond the halfway line.
- Variations: If the forwards regain possession, they can shoot immediately or launch an instant scoring attack.
- Coaching tip: Encourage the goalkeeper to remain calm. In modern 7-a-side football, the goalkeeper is the first playmaker and must learn to draw opponents in before releasing the ball.
11. Positional play with widened wide channels (U10)
- Objective: Teach players to use the flanks to stretch the playing area.
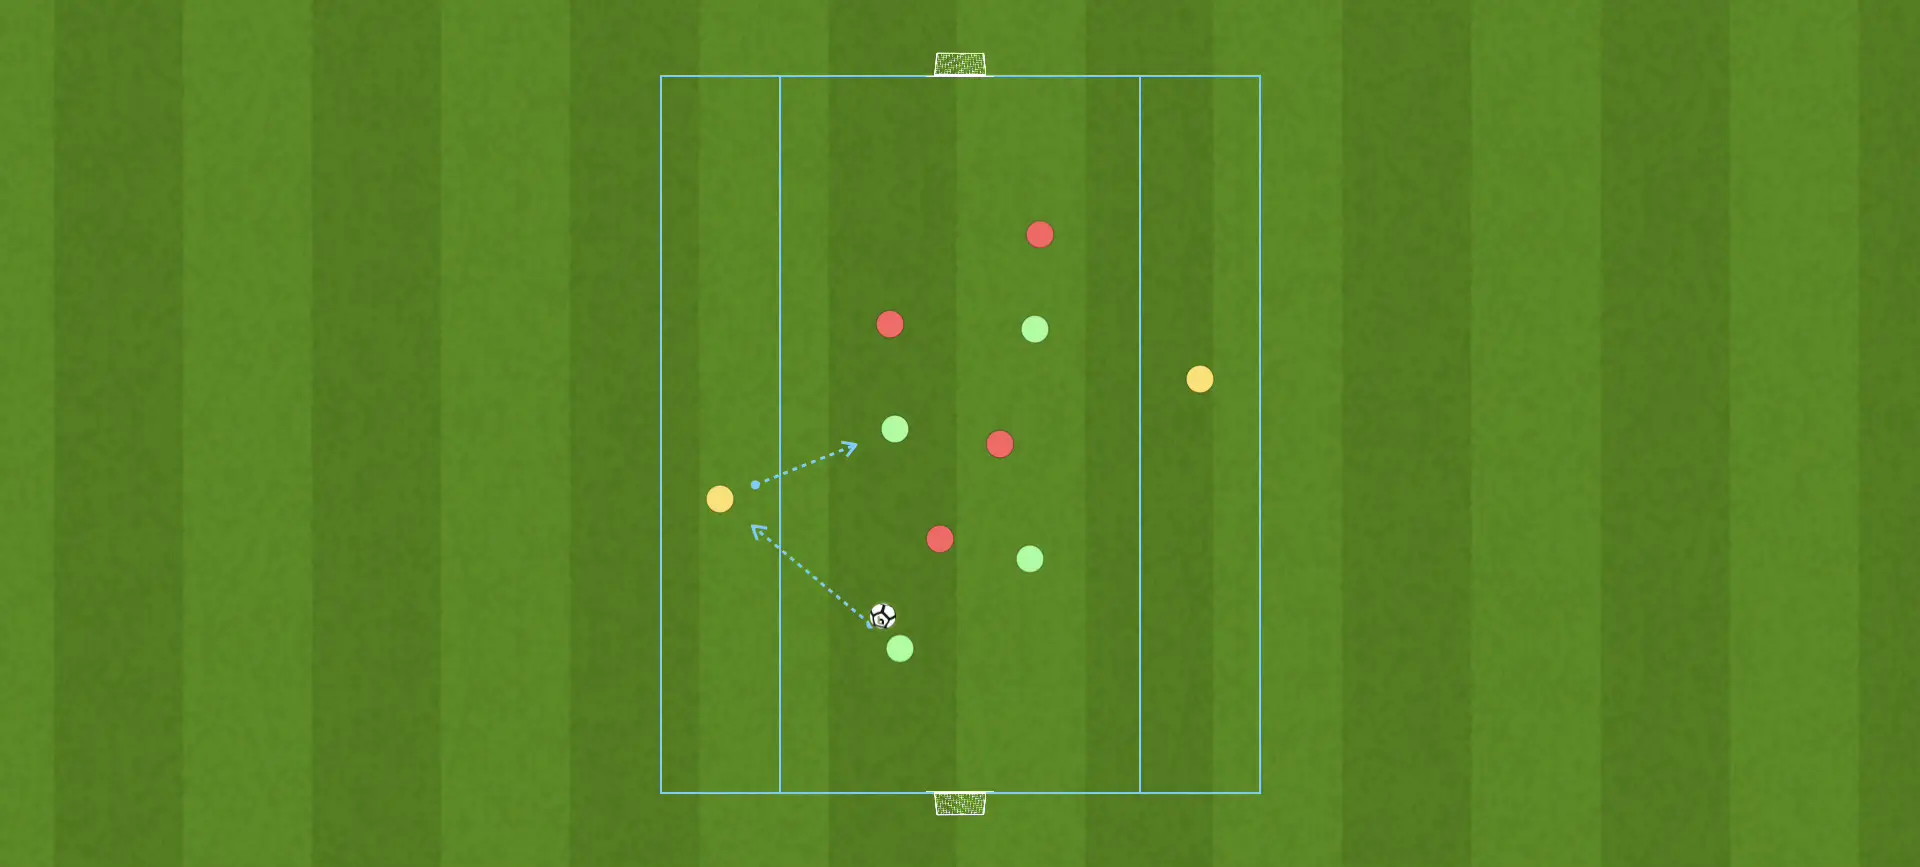
- Area: 30 x 25 metres, with two wide channels marked out using flat cones.
- Equipment: Flat cones, bibs and footballs.
- Organisation: Play a 4v4 with two neutral players restricted to the wide channels. The central channel is deliberately congested. To score in the opposition goal, the ball must first pass through at least one of the wide channels. No more than one defender may press a wide player at a time.
- Variations: The player in a wide channel can dribble inside if they identify space to exploit.
- Coaching tip: U10 players tend to ‘swarm like bees’ around the ball. Marking out the zones with flat cones gives them a clear visual reference and helps maintain the team’s shape.
12. Conditioned match with zones to improve spatial awareness (U10 and U12)
- Objective: Understand defensive cover and balance between the lines.
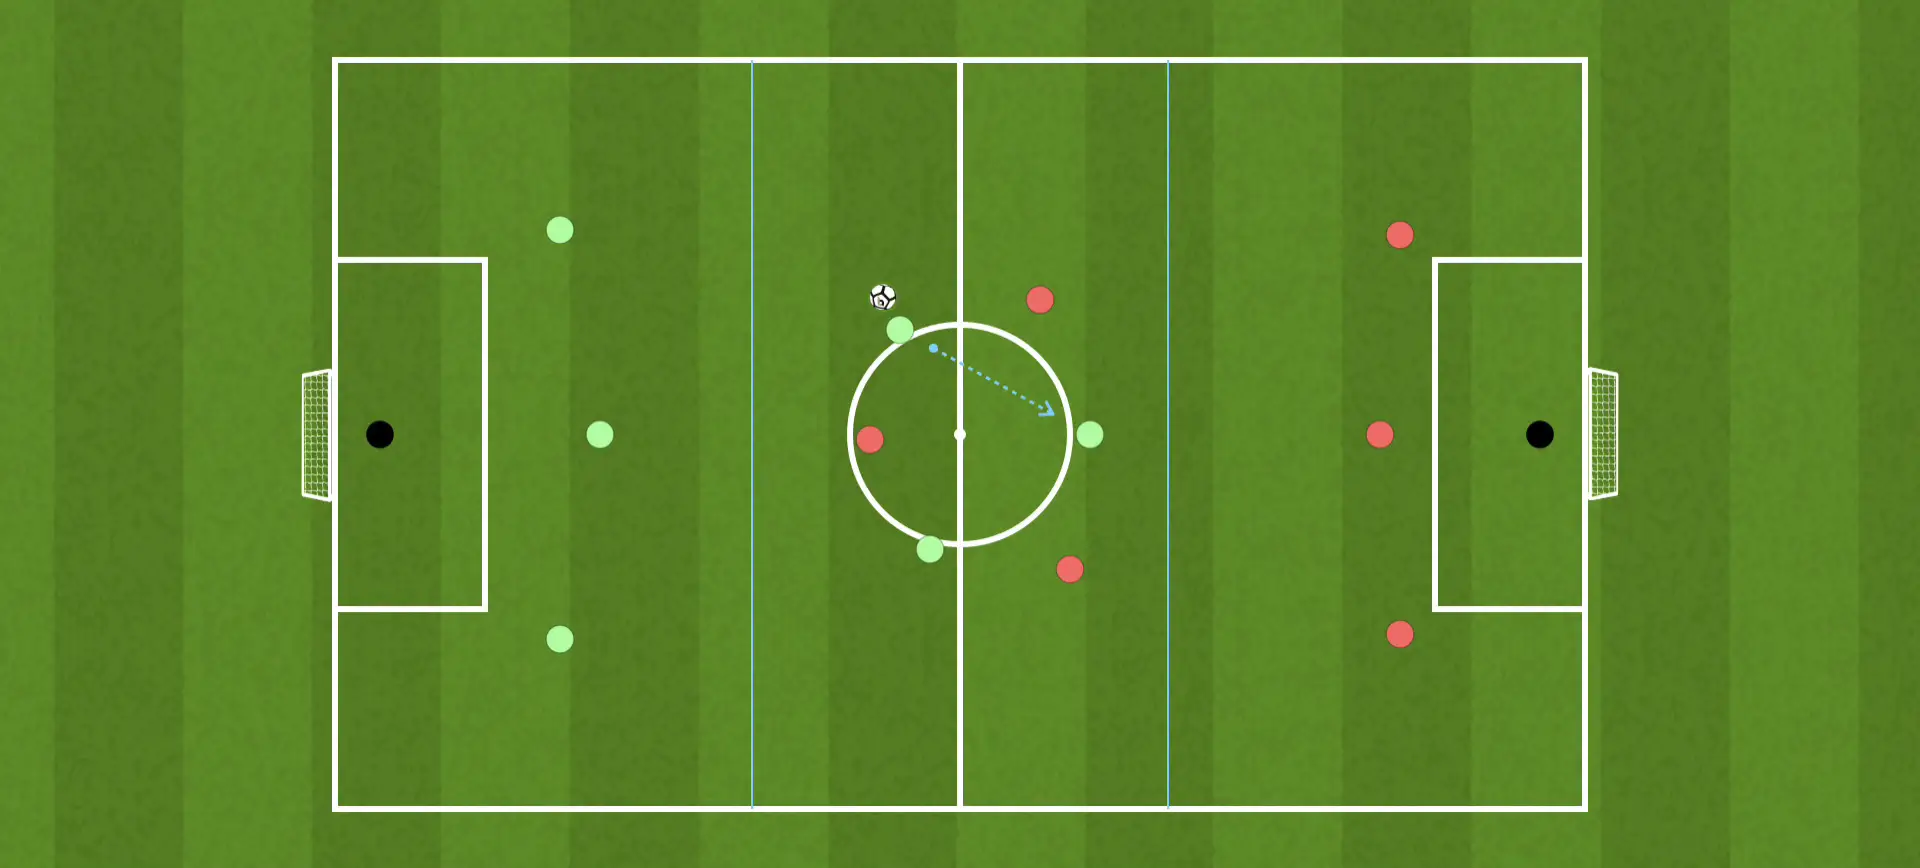
- Area: Full 7-a-side pitch divided into three horizontal zones: defence, build-up and finishing.
- Equipment: Cones to mark the three zones.
- Organisation: Play a normal 7v7 match with one tactical restriction: players cannot move into the next zone until the ball has entered it. In addition, at least one player in the defensive zone must remain there to prevent counter-attacks and provide cover if possession is lost.
- Variations: Remove all zone restrictions once the ball enters the final third, allowing players to make more fluid late runs from the second line.
- Coaching tip: An excellent drill for the final phase of a training session. It helps players connect their positions with real spatial responsibilities on the pitch.
Comparison table: drills by age group
| # | Drill name | Recommended age group | Main objective | Cognitive complexity |
|---|---|---|---|---|
| 1 | Positional 4v2 rondo with a switch of play | U12 | Ball retention and shifting across the pitch | High |
| 2 | 3v3 diamond possession + 2 neutral players | U10 | Body orientation and supporting options | Medium |
| 3 | Vertical progression zones: 3v3+1 | U10 / U12 | Incisive passes between the lines | Medium–High |
| 4 | Continuous 2v1 to 3v2 transition | U10 | Quick decision-making on the counter-attack | Medium |
| 5 | 4v4 counter-pressing wave | U12 | Defensive pressure and intensity | High |
| 6 | 1v1 duel with supporting players joining | U10 / U12 | Individual dribbling and defensive cover | Low–Medium |
| 7 | Crossing and finishing with progressive opposition | U12 | Runs off the ball and finishing in the box | High |
| 8 | Combination and shooting drill with a lay-off | U10 | Shooting from distance and one-two combinations | Low |
| 9 | 5v4 attack vs defence in half a pitch | U12 | Organised attacking and team formation | High |
| 10 | Playing out from the back: 4v3 | U12 | Creating a numerical advantage in the first line | High |
| 11 | Positional play with wide channels | U10 | Spatial occupation and width | Medium |
| 12 | Conditioned match with three zones | U10 / U12 | Defensive balance and team structure | Medium–High |
How to structure an effective 7-a-side football training session
Having the best 7-a-side football drills does not guarantee success if the session lacks a logical progression in intensity and a clear thread connecting each activity. Below is a recommended structure for a typical 75-minute session for U10 or U12 players.
+-------------------------------------------------------------------------+
|                    TYPICAL SESSION STRUCTURE (75 MIN)                   |
+-------------------------------------------------------------------------+
|  1. Warm-up and activation (15 min)                                     |
|     -> Mobility rondo or dynamic warm-up game.                          |
|                                                                         |
|  2. Main section - Focused technical/tactical drill (20 min)            |
|     -> Drill targeting the day's objective (e.g. Drill 3 or 8).         |
|                                                                         |
|  3. Main section - Integrated drill or match situation (25 min)          |
|     -> Conditioned match or wave-based drill (e.g. Drill 5 or 12).      |
|                                                                         |
|  4. Cool-down and feedback (15 min)                                     |
|     -> Gentle stretching, hydration and closing discussion.             |
+-------------------------------------------------------------------------+
The importance of digital planning
Nowadays, preparing sessions in paper notebooks wastes time and makes it harder to track training loads throughout the season. Specialist tools such as the bcoach tactical board and training app allow coaches to create drill diagrams in minutes, share demonstration videos with the coaching staff and maintain an organised database of all the season’s exercises.
A session prepared on a tablet or mobile device conveys professionalism and authority to the players, increasing their attention and significantly reducing downtime between drills.
Conclusion: Adaptability and continuous analysis are key
Success in developing young 7-a-side footballers does not depend on winning weekend matches by simply launching long balls forward. It depends on each child’s individual and integrated development. Using these 12 7-a-side football drills in your training sessions will help you build more intelligent teams that can read space, make decisions under pressure and enjoy the learning process.
Remember to observe your players throughout the session. If a drill is too difficult and players become frustrated, reduce the number of defenders or make the pitch bigger. If it is too easy, limit the number of touches or reduce the playing area. A coach’s ability to adapt is ultimately the key to the team’s progress.